Archive for the ‘cooking’ Category

Gluten Free Gingerbread Recipe

December 22, 2011
Gluten free gingerbread

Gluten free gingerbread

Gluten Free Gingerbread is really hard to make. I’ve tried and tested a lot of different recipes over the years and had some EPIC fails. But this year was MY YEAR! I did it. I made The Best Gluten Free Gingerbread. Can you see how excited I am about this? With all those Capital letters?! I love these sweet little decorated cookies, with their spicy bite. Don’t get me started on the smell as they bake, the whole house fills with Christmas.

Gluten free gingerbread men

Gluten free gingerbread men

This year I actually used an existing recipe and replaced the flour for gluten free flour. Its from Taste, its their Gingerbread Men recipe. I’ll list it below with the gluten free inclusion but I’ll also share some tips I worked out to make this easier to do. The nature of gluten free can sometimes be difficult to deal with. It doesn’t have the elastin properties wheat flour does. But there are ways! It’s totally worth the little bit of extra work because it the best gluten free gingerbread you’ve ever had. Trust me!

Gluten Free Gingerbread

Ingredients

  • Melted butter, to grease
  • 125g butter, at room temperature
  • 100g (1/2 cup, firmly packed) brown sugar
  • 125ml (1/2 cup) golden syrup or treacle
  • 1 egg, separated
  • 375g (2 1/2 cups) plain Gluten Free flour (I use white wings)
  • 1 tbs ground ginger
  • 1 tsp mixed spice
  • 1 tsp bicarbonate of soda

Method

Beat butter and sugar in bowl until creamy. Add the golden syrup and egg yolk. When combined add dry ingredients, Gluten Free flour, ginger, mixed spice, and bicarb soda. When combined it should form a very thick and elastic dough. It doesn’t need much working just scrape it out onto clingwrap (you’ll probably need a metal knife this is a strong sticky dough). Form into a flat disk and put it in the fridge.

The key to working with this dough is COLD. Lots of fridge time. I’ve even put it in the freezer let it defrost a little and worked with it from there. Put it in the fridge until its hard, so probably an hour. Once cold I cut the disk into quarters and work with each quarter leaving the rest in the fridge.

Preheat your oven to 180C. Roll the dough out between two sheet of baking paper until 3-4mm thick and about the size of your baking tray. Peel off the top baking paper only. I then use my cookie cutters to cut out shapes in the dough the distance I’d like them to be on the tray. Then carefully remove all the excess dough revealing the cookies how they’ll be cooked. Lift the baking paper sheet with the cookies (do not lift individual cookies or you’ll end up with elasto-gingerbread-man) onto the tray and place it all in the fridge for another 5-10minutes.

I use this process because the gingerbread is very stretchy and elastic, if you add more flour to dry it out it will just be a crumbly cracked mess, this makes a very delicious cookie that holds together very well and shouldn’t be dry or crumbly.

After cooling. Place the cookies in the oven for 5-10minutes. or until golden and cooked to your liking. I found 5-7 gives a softer gingerbread man, 7-8 worked perfectly in my oven and 10 produced a very crisp and very brown cookie. Just watch your first batch carefully to see how you’d like yours to turn out.

Let them cool for at least 30mins before decorating. You’ll note that I’ve used Cachous and mini MnM’s in some of my decorating. If you live in Australia they are not gluten free, but if you live in the US they are. My husband and neighbours are about to get lucky! Don’t worry, there are others I decorated purely gluten free for me to eat while I’m present wrapping! You can find lots of fun gluten free decorating shapes and 100’s and 1000’s in the baking isle at Coles. The mini heart ‘buttons’ are gluten free.

Decorate your Gluten Free Gingerbread

Decorate your Gluten Free Gingerbread

Store in an airtight container or they will go soft. They still taste good like this but you’ll end up with some amputees!

Gluten Free Christmas Gingerbread

Gluten Free Christmas Gingerbread

These are so good you can even pack them up and give them to all your friends, even those who dont eat gluten free! They wont be able to tell the difference!

Gluten Free Gingerbread Christmas Gifts

Gluten Free Gingerbread Christmas Gifts

Creamy Lemon Slice – Gluten Free

July 6, 2011

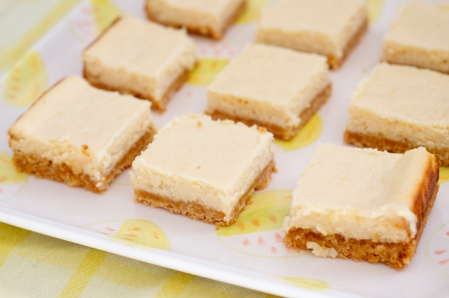
creamy gluten free lemon slice

I grew up on lemon slice a bit like this and its good. Kind of like a lemon hedgehog slice. You crush biscuits and then refrigerate instead of baking. Delicious and fresh but a little less sophisticated than what I was looking for. I wanted something creamier, with a biscuit base. So I came up with this.

gluten free lemon slice recipe

lemon slice squares, creamy goodness

I’ll let you in on a secret, the topping is actually based on the recipe on side of the Carnation Condensed Milk tin! Its awesome! Its so easy to forget the packet recipes, but generally they are well tested and worth having a go. Of course I had to make it gluten free and I wanted to use up some biscuits that didn’t turn out how I wanted, so this is what we ended up with, I think its my new favourite thing to bake!

Creamy Lemon Slice – Gluten Free

Creamy Gluten Free Lemon Slice Recipe

Lemony Squares

Base

  • 200g Gluten Free Shortbread biscuits (I made mine but really any gluten free biscuit will do)
  • 80g unsalted butter melted
  • 1/4 cup of sugar

Topping

  • 400g tin of condensed milk
  • 1 egg
  • 1 tblspn grated rind
  • 1/2 cup of lemon juice (2-3 lemons)
  • 2 tblspns of gluten free plain flour
  • 1 tspn baking powder

For Base

Preheat oven to 180C. Line a 16cm x 26cm slice tray with baking paper. Crumble biscuits. Combine crumbs, melted butter and sugar until it resembles wet sand. Press evenly into the base of tray. Bake for 8-10mins or until lightly golden. Remove allow to cool to room temp. What I love about this base is the extra sugar almost caramelises in the first baking making it slightly chewy. I’ve chosen unsalted butter because shortbread is often a bit salty, but this buttery, tiny bit salty base, is a perfect juxtaposition for the sweet, creamy, lemony top.

For Topping

Place Condensed Milk, and egg in a bowl beat well (by hand is sufficient) until well combined. Add lemon rind, juice, flour and baking powder. Beat again until combined. The baking powder will fizz as it reacts to the acidity of the lemon! Pour over cooled base and bake a further 20-25mins or until set in the center.

Allow to cool slightly before eating. In fact, eat warm right out of the oven, then put the rest in the fridge to have as a cold slice the next day!

lemon slice with a cup of tea

perfect with a cuppa

Chicken, Olive and Chorizo Bake

May 21, 2011

Donna Hay's version in the magazine!

Last night I cooked this recipe from an old Donna Hay magazine…32, if you are interested. Best thing about it is, its super fast to put together, stacks of flavour, both grown ups and the kids devoured it. Which means I didn’t get a chance to photograph it, but I can photograph the one in the magazine, photograph of a photograph? Of course because I cant leave well enough along I changed the recipe slightly but, well, mine looked pretty much the same, so here is what I used…

1 1/2 Kg of chicken drumsticks (because I was being cheap, but next time I’ll try it with a whole chicken cut into pieces for variety)

1 lemon, sliced

1 cup kalamata olives

1 venison chorizo sausage sliced (gluten free for me of course you can use regular chorizo)

4 large cloves of garlic (not even peeled)

1 cup chicken stock

50g of butter cut into small cubes

paprika

Preheat the oven to 200C. Put your baking dish on the stove and quickly brown the chicken and chorizo (1-2minutes). Add the lemon, olives, garlic, stock and butter. Sprinkle the chicken pieces with paprika and salt and pepper if desired. Roast for 30minutes or until the chicken is cooked through.

Serve with creamy mash. I like to use red or pink skinned potatoes with yellow flesh, smooshed (yes thats a word) with butter and milk to get the creamiest of mash.

Chocolate Hazelnut Baked Cheesecake – Gluten Free

May 19, 2011
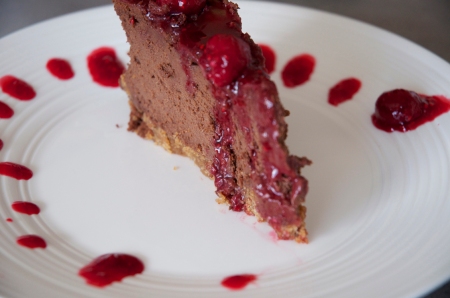
Gluten Free - Chocolate Hazelnut Baked Cheesecake

Gluten Free - Chocolate Hazelnut Baked Cheesecake

I made this cheesecake for Easter. Well the day before Easter (because cheesecake is always better on day 2,3, 4….if there is any left). Part of me wishes I hadn’t. Because once our decidedly spoilt and very lucky children were lavished with eggs from their adoring grandparents and aunties/uncles it all seemed like too much chocolate. Still, this is a decadent and delicious desert. I’ve been leaving the eggs alone and just eating this. Its awesome.

I started out by looking up one of my favourite cooking websites, epicurious. I came across this. There are over 100 reviews stating it was fantastic but you only needed a tiny bit to be satisfied. Sure, whatever, I thought, obviously these people don’t realllllly love chocolate. You know what, even after adapting it and making changes to make it gluten free, they are still right. Its completely decadent, you only need a tiny piece and it’s all totally worth it. I think my additions of a hazelnut base and a smothering of raspberries make it even more delicious. Why don’t you make it and see if you agree?

This would be a great dish if you had a large gathering of people to serve coffee or desert to. It would go a really long way, easily 20 serves, maybe even more. I might even try halving the recipe and cooking it square like a slice… mmmm. Oh and you could totally make this ‘normally’ ie. not gluten free.

Chocolate Hazelnut Baked Cheesecake – Gluten Free

Gluten Free Chocolate Hazelnut Baked Cheesecake

Gluten Free Chocolate Hazelnut Baked Cheesecake

Crust

  • 220g Gluten Free Hazelnut biscuits (I bought mine from Alternative Bites)
  • 50g Almond meal
  • 100g butter melted
  • 1/4 cup of sugar

Filling

  • 200g Dark Chocolate 70%
  • 900g cream cheese, at room temperature.
  • 1 1/4 cups of sugar
  • 1/4 cup of cocoa
  • 4 eggs

Raspberry Coulis

  • 500g Frozen Raspberries
  • 1/4 cup of castor sugar

Small easter eggs for decoration if desired.

For Crust

Preheat oven to 175C. Line the base of a 22cm spring form pan with baking paper. Process biscuits in blender until fine crumbs form. Add in almond meal and sugar, process again to combine. Pour in melted butter and blend again until combined and all crumbs are moist. Press into prepared pan and bake for 5-8minutes until ‘set’ or starting to lightly brown. Remove and allow to cool.

For Filling

Melt chocolate over a double boiler or carefully in the microwave. Allow to cool but make sure its still pourable. In a stand mixer or a really big bowl (and strong arms) with an electric hand beater beat the cream cheese, sugar and cocoa powder until smooth. Add in one egg at a time beating well after each addition. Mix in lukewarm chocolate. Pour filling over crust and smooth over top (I ended up using my hands….they were clean!) Don’t be afraid like I was, this mixture will fill up nearly to the very top of your pan, it doesn’t rise much as it bakes. Place a tray of hot tap water on the shelf below the center rack of your oven. This is supposed to stop the cheesecake cracking, mine still cracked but not as bad as I’ve had in the past without the water. Bake in the center of the oven for about an hour until the center seems mostly set and dry. Turn the oven off and leave door ajar for cake to cool (also supposed to stop cracking). When cool remove and run knife around edge to loosen, chill in the fridge over night. You can make this even two or three days in advance.

Raspberry Coulis

Put Raspberries and Sugar in a saucepan over a medium heat, cook until most raspberries and sugar are melted together. Allow to cool but make sure its still pourable. Pour over Chocolate Cheesecake and serve with any extra coulis.

Put any leftover cheesecake back in the fridge topped with all the coulis, this just gets better everyday.

Lime Madeleines – Gluten Free

May 15, 2011
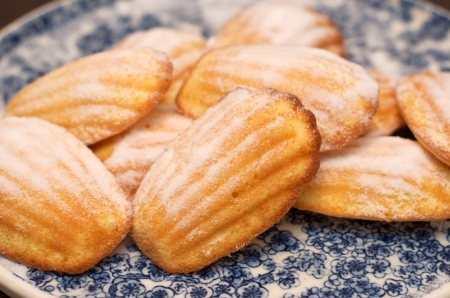
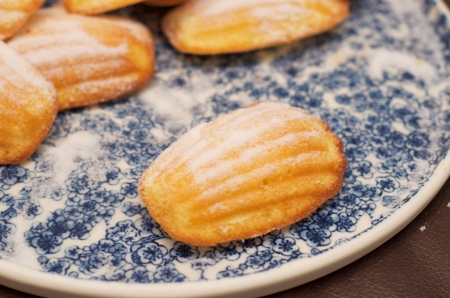
Gluten Free Madeleines

Gluten Free Madeleines

Madeleines are a great cake. Well, they’re almost a cake, almost a biscuit. They’re French, they’re little bites of perfection! They’re a little old fashioned so I think people may have forgotten to keep these on the list of regular baking. Let me encourage you these are a ‘must bake’ item.

Bonus is you can bake them with next to nothing in the fridge or pantry. Its great to make with the kids because they are so quick and the gratification is almost instantaneous. Does anyone else have trouble baking with the kids and then telling them, oh now just wait an hour for the cake to bake?! Finally, I think they are a good alternative to a pancake or scone.

Ideally you want a Madeleine Shell Pan. Only because they are the prettiest way to bake these cakes. The grooves add to the surface area that can brown and have a little crunch.

You could also use any one table spoon sized patty pan.

Lime Madeleines – Gluten Free

Gluten Free Madeleine Recipe

Gluten Free Madeleine Recipe

2 eggs

1/4 cup caster sugar

zest of one lime finely grated over mixing bowl

1/2 cup of plain flour

50g butter melted and cooled till warm

1 teaspoon of lime juice

extra caster sugar for dusting

Preheat your oven to 200C. Generously grease each shell with butter (this helps them crisp and brown). Beat the eggs and sugar with zest until pale and thick, about 5minutes. Add the flour and fold in gently until combined. Mix in the melted butter and lime juice. Spoon tablespoons of the batter into the moulds. Bake for 5-7minutes, until just cooked through. Careful not to over bake as they will dry out.

When cool enough to touch remove from tray and dust with castor sugar and a fresh sprinkle of lime zest (if desired) and eat while still warm.

Sick of Chocolate

May 8, 2011
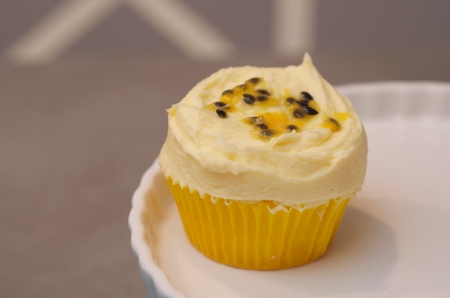
Gluten Free Passionfruit Buttercream Cupcakes

Gluten Free Passionfruit Buttercream Cupcakes

So I’m feeling a bit sick of chocolate. Its a big problem right? Im sitting down to my arvo coffee and I feel like something to go with it and there are all these easter eggs staring at me and I think…nahhhh. Big Problem. Huge! What if this continues? Will I ever love chocolate again?

Ok clearly I’ve lost the plot but hopefully me thinking these passionfruit buttercream cupcakes are yummy is not part of my insanity.

In an attempt to cut the chocolate overload I whipped up a batch of my favourite gluten free vanilla cupcakes and then went to town with the buttercream.

Passionfruit Buttercream Icing

Gluten Free Passionfruit Buttercream

Passionfruit Buttercream

200g cold butter

250g pure icing sugar

4 passionfruit

Whip the butter until light and white as possible. Meanwhile, push the passionfruit juice through a fine sieve with a spoon, leaving behind the seeds and some of the pulp. Add the icing sugar and the juice to the butter and whip until smooth. Ice cupcakes as desired and decorate with remaining seed and pulp. Easy, yummy and they cut through the chocolate overload nicely. The kettle is on!

Easter Craft and Baking

May 4, 2011

Hope you all had a Happy Easter. Somehow the 5 days afforded me lots of time to craft.

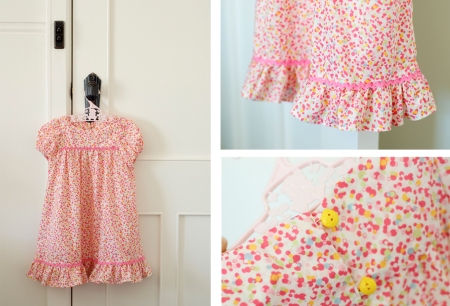
Easter dresses, which they immediately spent all day playing in the sand pit in… oh well that’s what they’re for right!

Easter Dresses

I made them from Japanese Voile, from a vintage pattern and a Japanese children’s book pattern.

Vintage Pattern and Japanese Childrens Clothing Book

The book pattern was even easier than the vintage pattern, even without any English.

Easter Dress Pattern from Japanese Childrens Clothing Book

I even figured out how to self-line the bodice (not part of the pattern) which helps with Voile as its so light weight. I love the little ruffly sleeves. This really was an amazingly easy pattern.

Easter Dress from Vintage Pattern

The vintage pattern was more complicated. The sizing was all off and I ended up winging it a fair bit.

If you look close you’ll see the pattern is a size 18mnth old. I put it on my 18month old and thought uh oh, and then I put it on my 3 year old. It fit the 3 year old – go figure! Although I still ended up making quite a few changes. Needless to say that pattern is not coming out again. (I guess I should have paid attention to the scribbles of ‘do not reorder’ across the top.)

Still, in the end the dresses turned out cute! I thought the bubbly fabric was Eastery and fun.

I made these little bunnies for the girls (from this free pattern by Hilary at wee wonderfuls) and put them outside their bedroom doors, with a small egg at their ‘feet’.

Bunny Softies For Easter

I cant take the credit for the cute embellishment ideas. I saw on flickr Katie another crafty-mama had done the same thing on a christmas gift. I hope she doesn’t mind! Isn’t imitation the greatest form of flattery or something?

When the girls woke up in the morning I could hear squeels of delight and they both came in hugging their bunnies and munching on the egg. They haven’t put them down all easter. So I’d say they’re a winner.

And having lots of family around gave me a great excuse to bake.

Cupcake Easter Nests

Easter Egg Cupcake Nest

Easter Egg Cupcake Nest

This is a Gluten Free Hazelnut Chocolate Cheesecake (topped with Raspberry Coulis and Easter Eggs). Its to die for. Literally. Its so rich but it will have you going back for more everytime. I can’t wait till we finished it so I dont feel like I put on 3 kilos everytime I eat a slice.

Gluten Free - Chocolate Hazelnut Baked Cheesecake

Gluten Free - Chocolate Hazelnut Baked Cheesecake

Oh and we made a new addition to our family….

3 day old chickens

They are the cutest little things. The kids LOVE them.

Three day old chickens

Happy Easter

Happy Birthday Sam I am

August 18, 2010

Green Eggs and Ham by Dr Seuss is one of my daughters favourite books. On ABC breakfast radio this morning they announced that it is the 50th anniversary of it being released. So I told the girls that today is Sam I am’s birthday. To celebrate we had green eggs and ham for dinner.

Green Eggs and Ham Book Cover

Green Eggs and Ham

My daughter insisted we have ‘a big ham like that one mum, with a fork’ (pointing to the ham leg on the cover). So I sort of complied. Instead of buying sliced ham (as I would usually do) I bought it as a piece. I should do this more often, its the nicest way to have ham, I think that every christmas then forget to do it through out the year.

Green Eggs and Ham

Our Real Life Green Eggs and Ham

Although a little disappointed that the ham wasn’t green (sorry I’m not taking the food dye to the ham) the she was pretty stoked. Although my effort to make it nutritious by adding English spinach didn’t really fly. After announcing ‘I do like them, I do like green eggs and ham’ she proceeded to say ‘I will not eat leaves’.

green eggs and ham for dinner

green eggs and ham for dinner

However served on a toasted English muffin and topped it with Hollandaise sauce, even us grown-up wanted to eat these green eggs and ham. We do like leaves, ‘they are so good, so good you see’.

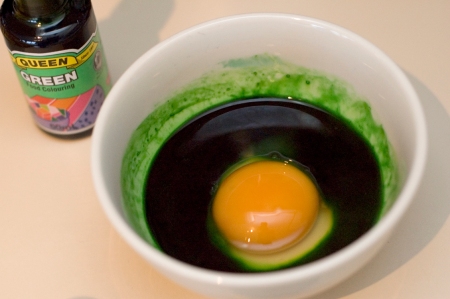
To make the eggs green all I did was crack an egg into a small ceramic bowl. I then poured about a teaspoon of green food dye into the egg white and stirred just the white very gently in a circular motion. I let them sit like that for about 10minutes before sliding into the fry pan.

how to make green eggs and ham

how to: green eggs

(To make it gluten free just served mine on top of toasted gluten free turkish bread). We’ve read the book about three times today, but at the moment that’s an average day!

Triple Chocolate Chip Cookie Recipie – Gluten Free

July 30, 2010

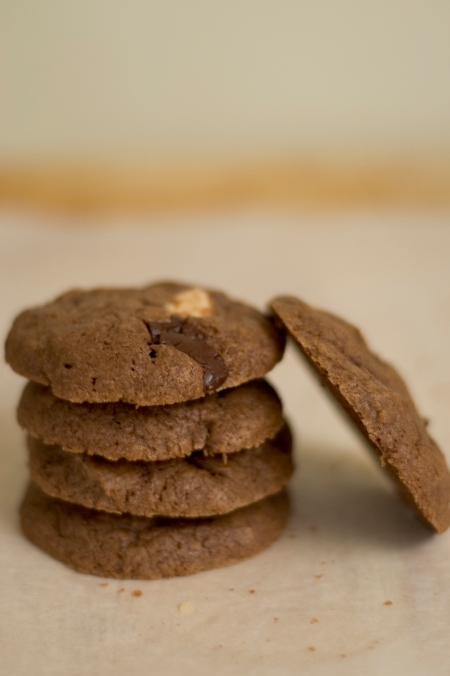
These are the best chocolate biscuits ever, no, I really mean it. Ever. They’re soft chewy, buttery, chocolaty, my ideal sort of biscuit. They have white and dark chocolate chunks in a chocolate cookie dough.

I’ve been making this recipe for about 20 years. Although it has really evolved over time to become the one listed below. Especially as it started out as normal non-gluten free, chocolate chip cookie dough. The one thing that hasn’t changed is the way they disappear within an hour of being taken out of the oven.

It makes a huge batch so I divide into thirds. Bake a third, shape the other two thirds into logs and wrap with cling wrap. I put one in the fridge (so we can have fresh baked cookies three days later) and put the other log into the freezer. I bring them to room temp before cutting up and baking as per normal.

Gluten Free Triple Chocolate Cookies

Gluten Free Triple Chocolate Cookies

250g butter

1 cup brown sugar

1/3 cup sugar

3 eggs

2 cups of gluten free plain flour (I use white wings)

1 teaspoon baking powder

1/2 cup of cocoa powder

120g of dark chocolate chopped into chunks

120g of white chocolate chopped into chunks

Preheat oven to 180C. Line a standard biscuit tray with baking paper. Beat together butter and sugars. Add eggs one at a time, beating well after each addition. Turn mixer to low and add flour, baking powder and cocoa powder, mix until combined. Stir in chopped chocolate. Place well spaced rounded tablespoons of the mixture onto the baking tray. If you are storing some for later place 10-12 biscuits on the tray and bake in the oven for 20-25 minutes or until lightly browned on top but still moist in the center. Remove from oven and allow to sit on the tray for 5 minutes before transferring to cooling rack.

While the biscuits are baking divide the rest of the mixture in half. Place each half on separate large sheets of cling wrap. Form into log shapes wrapping tightly. Place in fridge for up to three days or in the freezer for up to two months. (Don’t worry it wont stay there that long!) Enjoy!

Oven Update

July 19, 2010

So I know I’ve devoted an entire post to ovens already but I thought I’d update you on the final result.

I love traditional ovens. Yes they are hard to find here in Perth and they can be expensive. I very nearly bought this oven:

Fratelli Onofri oven

I know it’s not white and silver (my dream combination) but I figured I could make it work. It was a good price for a period style oven with a great load of features. However, just before I bought it I read some reviews that pointed out the internal capacity of the oven was very small. So I panicked. The reviews suggested I go down to a show room and take all my favourite baking pans and try them in an oven.

There isn’t a show room for the Fratelli Onofri here in Perth but (like a crazy lady) I packed up my stuff and headed down to the ilve showroom in Osborne Park. Lo and behold the 60cm oven wouldn’t fit a rectangular sized biscuit tin or my large roasting pan. Now I have no problem buying new baking pans BUT I know that when I cook a roast for the family I fill up that roasting pan. I also know my recipes for biscuits use up all the space on my baking tray, so having to use smaller tins and trays is going to be a problem. I also figured out that you can’t fit anything in the 30cm oven. Not a muffin pan, slice tray, standard dinner plate. Nothing. Biiig problem. If you’re paying money for a second oven, you want to be able to use it right?! Sure I could still put my rotisserie chicken in it, but I don’t think its economical to pay extra for what would essentially be a rotisserie oven.

I actually own an old 90cm double oven (60cm, 30cm) I can easily fit Everything in the 60cm oven and I can fit muffin pans, plates, slice trays all kinds of things in the 30cm. After asking why I was having trouble achieving the same thing, I found out that the way they make ovens has changed. These days the insulation and internal workings take up more room, internal capacity of an old 90cm oven is much larger. So I realised whilst I still wanted a double oven I was going to need an even larger one, the problem was we’d just finished fitting the kitchen assuming I would choose one of the 90cm double ovens.

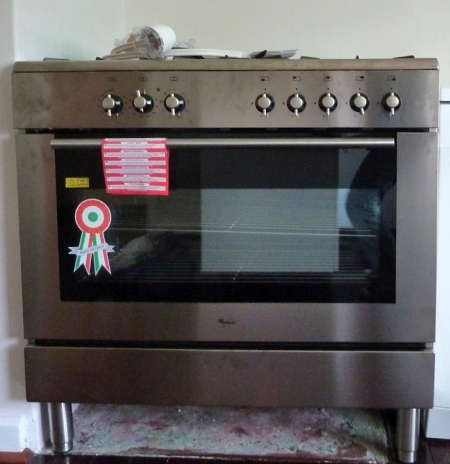
So we went to plan….um ‘e’? I bought the cheapest 90cm oven we could find and here she is:

Cheapest 90cm Oven we could find

(Ovens should be a she right?) She’s being fitted this week and as they say ‘we’ll be cooking with gas’ – literally. Ugh, look at the fingerprints all over it already. Why do people love stainless steel so???

In case you’re wondering what I will buy one day when we do our extension, I’ve got my eye on the ilve 100cm double oven, beautiful!

100cm Nostalgie 6burner double oven

Yes its beautiful, expensive and I can have it in ANY colour I want with silver trim (as long as I order it 16WEEKS before I want it!)…one day.