Archive for May, 2011

Apron for Fun

May 27, 2011

Apron with babushka trim

In case you hadn’t noticed I cook a lot. I like it. Its great fun, but its messy.
I find having an apron is handy. Its kinda like tying a tea-towel around your waist and having it not only protect your clothes but a place to grab hot dishes and dry your hands without spinning around in circles looking for that tea-towel that you knew was there two seconds ago.

tied with a nice big bow

Now because I think they are handy I inflict them upon my friends as gifts. But I try to make them fun so they don’t feel like nanas and might actually use them! Recently I made this one for one of my best friends. She became a mama just under a year ago. One of the most fun things is cooking with your kids and it wont be long before she is cooking with her little man. So I thought it would helpful to send her some fun things to use in the kitchen with him. Including this apron.

I followed a down-loadable tutorial and free pattern from a website called Living Creatively. I can’t for the life of me find it. I wanted to link you to their site where the download was but it’s just not there. It was an aussie site so I’m a bit sad they’ve disappeared, I searched the web and it seems others are having trouble finding them. The most recent thing I can find on them is a year and a half old so I figure they’ve gone. Such a shame. But I still really want you to be able to have the file so I’m going to load it to this post. I have no idea if thats bad blog edict or down right wrong or completely ok but eh, I guess I can always take it down if someone gets upset. Free Apron Pattern

I had some fun with this one because I was teaming it with some super cute Babushka measuring cups. I have some myself and they entertain the girls for hours in the kitchen, plus they’re useful and they look super cute sitting on top of my fridge! So in keeping with the theme I trimmed it in some fun Japanese print babushka fabric.

Babushka waistband

Wave Trim with Babushka and ric-rack fun!

Added a pocket (that’s not in the pattern)

Added a cute little ric-rack trimmed pocket

Love something that has style and function! That’s the best kind of gift and it’s so easy to personalise.

Quilt Square Bag – A Mothers Day Gift

May 22, 2011
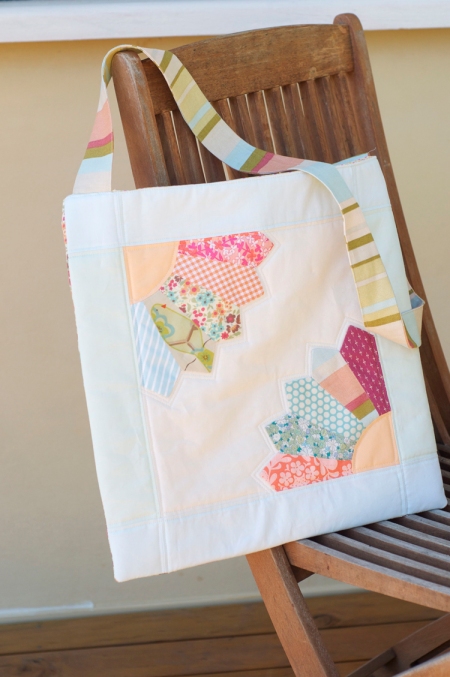
Mothers Day Gift for a Quilter

Mothers Day Gift for a Quilter

Just before mothers day my step-mum lent me her quilting square to use on a little project I’ve been working on. She’s a fantastic quilter and has made the quilts that live in our house. Some of the beautiful things I’ve seen her make for the rest of our family and friends is very inspirational. She even made us a quilt as a wedding gift.

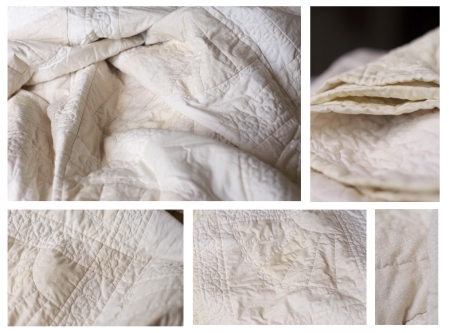
Neutral Tone and Tone Quilt

Our Wedding Quilt

It is a beautiful cream and white quilt that has heaps of sentimental value. It took 3years to make and a lot of it was done by hand while my Dad was recovering in hospital from Leukemia. I think she even made him help at points! I will treasure it my whole life, hopefully if I look after it can become a bit of an heirloom.

Anyway as she handed it to me (the square not the quilt, back on track now) she said ‘don’t mind the corner I dropped it.’ she then said ‘I should really make a bag to protect it but, well, that’s on the list’. I know what she means about the list. All those little crafty projects you want to do but somehow other things skip to the top of the list instead. Usually things for other people. That’s her all over, always crafting for others. So I figured maybe I’ll do a little crafting for her.

Transporting and Protecting a Square Ruler

Protecting her Square Ruler

I don’t know much about the quilting world, but I do know that a lot of the time they pack up and get together, lugging all their gear and machines to the one location. No wonder squares and rulers get dropped. I figured I’d try and help her out by making a quilted quilting square bag.

Quilting Square Bag, Back

The Back, in my favourite fabric at the moment!

My quilting is ummm ‘beginner’ to say the least so I hope its not embarrassing to take it to all her quilting do’s. But at least it’s protected and shouldn’t be dropped any more.

I added a long strap so she can cross it over her body leaving her hands free to grab other things.

Quilt Square Bag

The Bag in action!

I’m really pleased with my ‘perfect mothers day gift’. I love it when a plan comes together.

Chicken, Olive and Chorizo Bake

May 21, 2011

Donna Hay's version in the magazine!

Last night I cooked this recipe from an old Donna Hay magazine…32, if you are interested. Best thing about it is, its super fast to put together, stacks of flavour, both grown ups and the kids devoured it. Which means I didn’t get a chance to photograph it, but I can photograph the one in the magazine, photograph of a photograph? Of course because I cant leave well enough along I changed the recipe slightly but, well, mine looked pretty much the same, so here is what I used…

1 1/2 Kg of chicken drumsticks (because I was being cheap, but next time I’ll try it with a whole chicken cut into pieces for variety)

1 lemon, sliced

1 cup kalamata olives

1 venison chorizo sausage sliced (gluten free for me of course you can use regular chorizo)

4 large cloves of garlic (not even peeled)

1 cup chicken stock

50g of butter cut into small cubes

paprika

Preheat the oven to 200C. Put your baking dish on the stove and quickly brown the chicken and chorizo (1-2minutes). Add the lemon, olives, garlic, stock and butter. Sprinkle the chicken pieces with paprika and salt and pepper if desired. Roast for 30minutes or until the chicken is cooked through.

Serve with creamy mash. I like to use red or pink skinned potatoes with yellow flesh, smooshed (yes thats a word) with butter and milk to get the creamiest of mash.

Chocolate Hazelnut Baked Cheesecake – Gluten Free

May 19, 2011
Gluten Free - Chocolate Hazelnut Baked Cheesecake

Gluten Free - Chocolate Hazelnut Baked Cheesecake

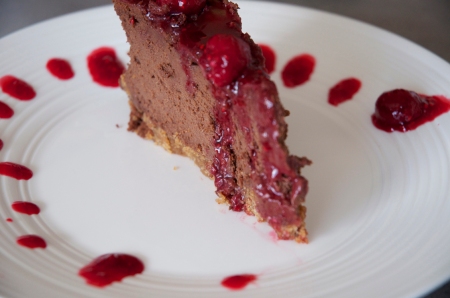
I made this cheesecake for Easter. Well the day before Easter (because cheesecake is always better on day 2,3, 4….if there is any left). Part of me wishes I hadn’t. Because once our decidedly spoilt and very lucky children were lavished with eggs from their adoring grandparents and aunties/uncles it all seemed like too much chocolate. Still, this is a decadent and delicious desert. I’ve been leaving the eggs alone and just eating this. Its awesome.

I started out by looking up one of my favourite cooking websites, epicurious. I came across this. There are over 100 reviews stating it was fantastic but you only needed a tiny bit to be satisfied. Sure, whatever, I thought, obviously these people don’t realllllly love chocolate. You know what, even after adapting it and making changes to make it gluten free, they are still right. Its completely decadent, you only need a tiny piece and it’s all totally worth it. I think my additions of a hazelnut base and a smothering of raspberries make it even more delicious. Why don’t you make it and see if you agree?

This would be a great dish if you had a large gathering of people to serve coffee or desert to. It would go a really long way, easily 20 serves, maybe even more. I might even try halving the recipe and cooking it square like a slice… mmmm. Oh and you could totally make this ‘normally’ ie. not gluten free.

Chocolate Hazelnut Baked Cheesecake – Gluten Free

Gluten Free Chocolate Hazelnut Baked Cheesecake

Gluten Free Chocolate Hazelnut Baked Cheesecake

Crust

  • 220g Gluten Free Hazelnut biscuits (I bought mine from Alternative Bites)
  • 50g Almond meal
  • 100g butter melted
  • 1/4 cup of sugar

Filling

  • 200g Dark Chocolate 70%
  • 900g cream cheese, at room temperature.
  • 1 1/4 cups of sugar
  • 1/4 cup of cocoa
  • 4 eggs

Raspberry Coulis

  • 500g Frozen Raspberries
  • 1/4 cup of castor sugar

Small easter eggs for decoration if desired.

For Crust

Preheat oven to 175C. Line the base of a 22cm spring form pan with baking paper. Process biscuits in blender until fine crumbs form. Add in almond meal and sugar, process again to combine. Pour in melted butter and blend again until combined and all crumbs are moist. Press into prepared pan and bake for 5-8minutes until ‘set’ or starting to lightly brown. Remove and allow to cool.

For Filling

Melt chocolate over a double boiler or carefully in the microwave. Allow to cool but make sure its still pourable. In a stand mixer or a really big bowl (and strong arms) with an electric hand beater beat the cream cheese, sugar and cocoa powder until smooth. Add in one egg at a time beating well after each addition. Mix in lukewarm chocolate. Pour filling over crust and smooth over top (I ended up using my hands….they were clean!) Don’t be afraid like I was, this mixture will fill up nearly to the very top of your pan, it doesn’t rise much as it bakes. Place a tray of hot tap water on the shelf below the center rack of your oven. This is supposed to stop the cheesecake cracking, mine still cracked but not as bad as I’ve had in the past without the water. Bake in the center of the oven for about an hour until the center seems mostly set and dry. Turn the oven off and leave door ajar for cake to cool (also supposed to stop cracking). When cool remove and run knife around edge to loosen, chill in the fridge over night. You can make this even two or three days in advance.

Raspberry Coulis

Put Raspberries and Sugar in a saucepan over a medium heat, cook until most raspberries and sugar are melted together. Allow to cool but make sure its still pourable. Pour over Chocolate Cheesecake and serve with any extra coulis.

Put any leftover cheesecake back in the fridge topped with all the coulis, this just gets better everyday.

Lime Madeleines – Gluten Free

May 15, 2011
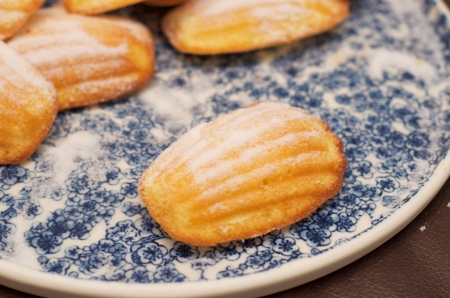
Gluten Free Madeleines

Gluten Free Madeleines

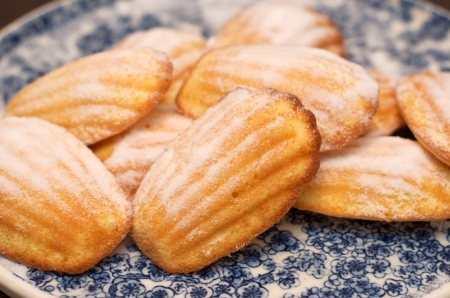
Madeleines are a great cake. Well, they’re almost a cake, almost a biscuit. They’re French, they’re little bites of perfection! They’re a little old fashioned so I think people may have forgotten to keep these on the list of regular baking. Let me encourage you these are a ‘must bake’ item.

Bonus is you can bake them with next to nothing in the fridge or pantry. Its great to make with the kids because they are so quick and the gratification is almost instantaneous. Does anyone else have trouble baking with the kids and then telling them, oh now just wait an hour for the cake to bake?! Finally, I think they are a good alternative to a pancake or scone.

Ideally you want a Madeleine Shell Pan. Only because they are the prettiest way to bake these cakes. The grooves add to the surface area that can brown and have a little crunch.

You could also use any one table spoon sized patty pan.

Lime Madeleines – Gluten Free

Gluten Free Madeleine Recipe

Gluten Free Madeleine Recipe

2 eggs

1/4 cup caster sugar

zest of one lime finely grated over mixing bowl

1/2 cup of plain flour

50g butter melted and cooled till warm

1 teaspoon of lime juice

extra caster sugar for dusting

Preheat your oven to 200C. Generously grease each shell with butter (this helps them crisp and brown). Beat the eggs and sugar with zest until pale and thick, about 5minutes. Add the flour and fold in gently until combined. Mix in the melted butter and lime juice. Spoon tablespoons of the batter into the moulds. Bake for 5-7minutes, until just cooked through. Careful not to over bake as they will dry out.

When cool enough to touch remove from tray and dust with castor sugar and a fresh sprinkle of lime zest (if desired) and eat while still warm.

Rainbow Pencil Roll

May 12, 2011

A little friend of ours turned 4 this week. I find when buying young children’s gifts I always go for clothes. It must be so dull for the poor child but I know the parents are grateful. Well, I always am when I get clothes for my girls because they forever seem to be growing out of them. As the kids we get gifts for get older I try to make sure there is something fun in there too. Which is why I made this pencil roll.

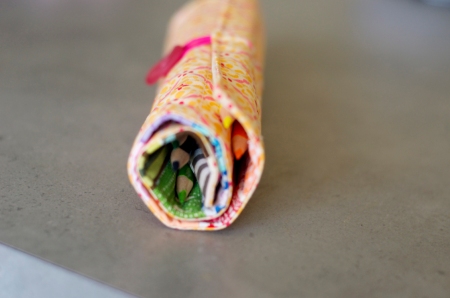
Rainbow Pencil Roll

Rainbow Pencil Roll

Fun isn’t it? I think as a kid I would have loved having one of these. Actually I’d probably be pretty happy to tote one around now. Being someone who loves things to match and have their place I would have carefully made sure each pencil was in its spot every time.

It rolls up so nice and neat too.

Pencil Roll

Pencil Roll

So its easy to carry around for ‘on the go’ sketching and colouring in. Perfect for car trips or plane rides.

Its a really easy project to put together, I think the most time consuming part is matching the fabrics to the pencils. I thought I’d have to go out and buy some but I managed to pull out some fabrics I totally forgot I had. Its also an interesting lesson on the way colours work. For example I knew I didn’t have black but thinly striped grey fabric actually played the roll perfectly, in fact I think it sits nicely with the colours better than a black fabric would have.

There are heaps of tutorials for this sort of thing on the web, just google pencil roll tutorial. I browsed through quite a few but in the end didn’t follow any particular one. Basically I just cut 1.5inch strips, 2inch taller than my pencils, of each colour, and stitched them together with 1/4inch seam allowances. That gave me the size of my roll.

Rainbow Pencil Roll

Rainbow Pencil Roll

I then cut out backing fabric, a piece of flannelet to act as ‘wadding’, and a plain pocket piece all the same size. I layered them the way they would look when finished and folded the pocket piece down to half the height of the backing, I then placed the backing fabric right side down and stitched them all together leaving a gap to turn them out the right way.

Then, using the seams of the coloured strips as a guide I top-stitched the individual pockets. Finishing off the pouch by top-stitching all the way around and inserting a hair tie as the clasp to go around the button. Stitching on the button last to find its perfect spot.

Pencil Roll

Just the spot to keep your pencils

Oh if you one of your kids has a birthday coming up… I hope they like colouring in!

Sick of Chocolate

May 8, 2011
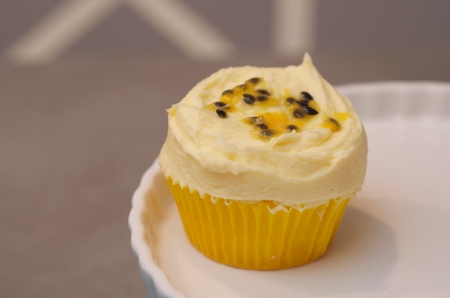
Gluten Free Passionfruit Buttercream Cupcakes

Gluten Free Passionfruit Buttercream Cupcakes

So I’m feeling a bit sick of chocolate. Its a big problem right? Im sitting down to my arvo coffee and I feel like something to go with it and there are all these easter eggs staring at me and I think…nahhhh. Big Problem. Huge! What if this continues? Will I ever love chocolate again?

Ok clearly I’ve lost the plot but hopefully me thinking these passionfruit buttercream cupcakes are yummy is not part of my insanity.

In an attempt to cut the chocolate overload I whipped up a batch of my favourite gluten free vanilla cupcakes and then went to town with the buttercream.

Passionfruit Buttercream Icing

Gluten Free Passionfruit Buttercream

Passionfruit Buttercream

200g cold butter

250g pure icing sugar

4 passionfruit

Whip the butter until light and white as possible. Meanwhile, push the passionfruit juice through a fine sieve with a spoon, leaving behind the seeds and some of the pulp. Add the icing sugar and the juice to the butter and whip until smooth. Ice cupcakes as desired and decorate with remaining seed and pulp. Easy, yummy and they cut through the chocolate overload nicely. The kettle is on!

Easter Craft and Baking

May 4, 2011

Hope you all had a Happy Easter. Somehow the 5 days afforded me lots of time to craft.

Easter dresses, which they immediately spent all day playing in the sand pit in… oh well that’s what they’re for right!

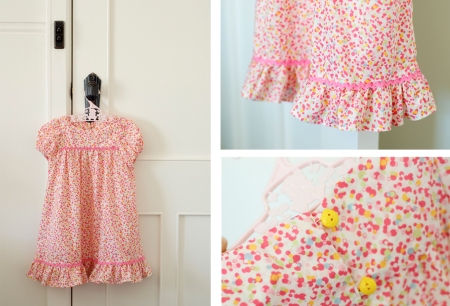
Easter Dresses

I made them from Japanese Voile, from a vintage pattern and a Japanese children’s book pattern.

Vintage Pattern and Japanese Childrens Clothing Book

The book pattern was even easier than the vintage pattern, even without any English.

Easter Dress Pattern from Japanese Childrens Clothing Book

I even figured out how to self-line the bodice (not part of the pattern) which helps with Voile as its so light weight. I love the little ruffly sleeves. This really was an amazingly easy pattern.

Easter Dress from Vintage Pattern

The vintage pattern was more complicated. The sizing was all off and I ended up winging it a fair bit.

If you look close you’ll see the pattern is a size 18mnth old. I put it on my 18month old and thought uh oh, and then I put it on my 3 year old. It fit the 3 year old – go figure! Although I still ended up making quite a few changes. Needless to say that pattern is not coming out again. (I guess I should have paid attention to the scribbles of ‘do not reorder’ across the top.)

Still, in the end the dresses turned out cute! I thought the bubbly fabric was Eastery and fun.

I made these little bunnies for the girls (from this free pattern by Hilary at wee wonderfuls) and put them outside their bedroom doors, with a small egg at their ‘feet’.

Bunny Softies For Easter

I cant take the credit for the cute embellishment ideas. I saw on flickr Katie another crafty-mama had done the same thing on a christmas gift. I hope she doesn’t mind! Isn’t imitation the greatest form of flattery or something?

When the girls woke up in the morning I could hear squeels of delight and they both came in hugging their bunnies and munching on the egg. They haven’t put them down all easter. So I’d say they’re a winner.

And having lots of family around gave me a great excuse to bake.

Cupcake Easter Nests

Easter Egg Cupcake Nest

Easter Egg Cupcake Nest

This is a Gluten Free Hazelnut Chocolate Cheesecake (topped with Raspberry Coulis and Easter Eggs). Its to die for. Literally. Its so rich but it will have you going back for more everytime. I can’t wait till we finished it so I dont feel like I put on 3 kilos everytime I eat a slice.

Gluten Free - Chocolate Hazelnut Baked Cheesecake

Gluten Free - Chocolate Hazelnut Baked Cheesecake

Oh and we made a new addition to our family….

3 day old chickens

They are the cutest little things. The kids LOVE them.

Three day old chickens

Happy Easter